|
A common task for Windows Mobile device users is the need to transfer study files from their main computer to their handheld. These instructions cover transfers from the desktop computer to the handheld, but work just as well for transfers from the handheld computer to the desktop. Open the Connection Between Computers To start the process, you should connect your handheld to your desktop computer and wait for the 'sync' process to complete. Once you connect your handheld to your desktop computer, the window shown below should open on your desktop and will indicate the progress of the 'sync' process. When the 'sync' is complete, all status indicators will show a Status of "Synchronized", as shown below. The next step is to open the Explorer window showing the contents of your handheld. This is done by clicking on the "Explore" button, indicated by a red arrow below: 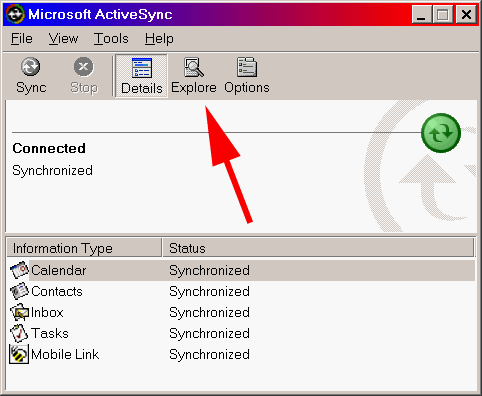 After you have clicked on the "Explore" button, you will see something resembling the screen shown below, which depicts the topmost level of your handheld. You will next want to open the root directory on your handheld, indicated by the red arrow below. 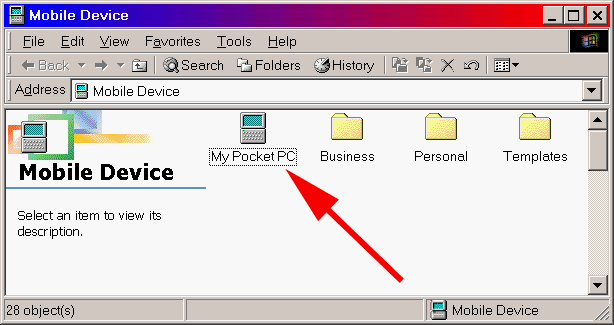 The next step will be determined by what you are trying to do. If you want to access the HandyCards program directory to install a new version of HandyCards, you will want to begin here. If you want to access the HandyCards data file directory to transfer a new or updated study file, you will want to begin here. The remainder of the instructions assumes you are working with a storage card in your device, have HandyCards installed on your storage card, and also have the data files on your storage card. If this is not the case, the instructions are very similar and the differences will be mentioned in the appropriate context.
HandyCards Program Directory Access After you have clicked on the icon for your handheld, as indicated in above you will see a screen similar to the one directly below. To access the HandyCards directory, you will first need to open the storage card by clicking on the "Storage Card" icon indicated by the red arrow below [NOTE: If you are not using a storage card, you will instead click on the "Program Files" icon, also shown below] 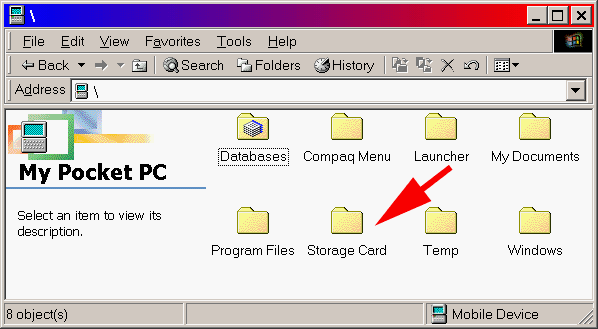 After you have opened the storage card, you will want to open the HandyCards directory, as indicated by the red arrow below [NOTE: If you are not using a storage card, the HandyCards directory will only be called "HandyCards" and not the longer folder name shown below] 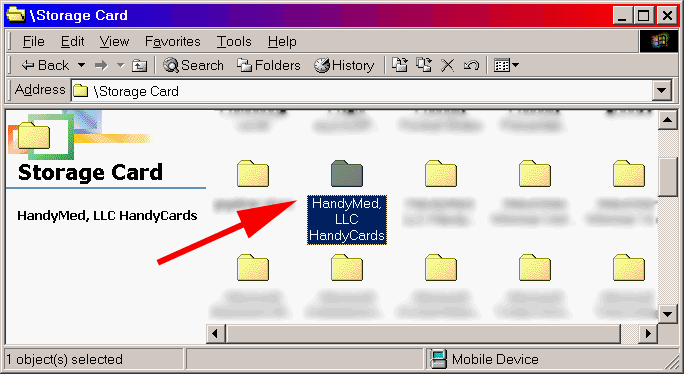 After you have opened the HandyCards directory, you will see the folder contents, as shown in below. This is the folder in which you would place new copies of the HandyCards program, typically called "HandyCards.vb". If you are going to insert a new copy of HandyCards, it is usually recommended that you first rename the original copy (e.g. HandyCardsOld.vb) so that it is not erased when you insert a new version. 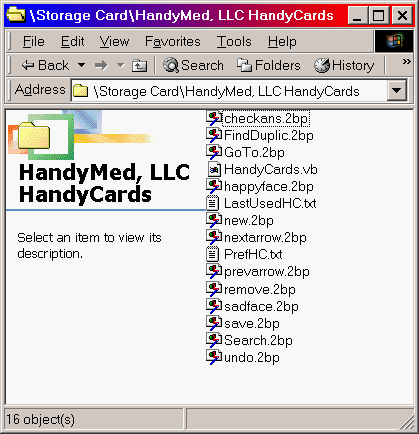 As mentioned earlier, this tutorial assumes you are using a storage card.. As such, you will look for (or create) your data folder on your storage card, in the My Documents folder. You will open the connection between your desktop and handheld computer, click on the icon for your handheld, and then open your storage card. After you have opened your storage card, open your "My Documents" folder, as indicated by the red arrow below. All data files, regardless of the program, must be placed into your "My Documents" folder or a folder contained therein. [NOTE: If you are not using a storage card, you will still need to place your data files in your "My Documents" folder in main memory, as indicated by the red arrow in the second screenshot below] 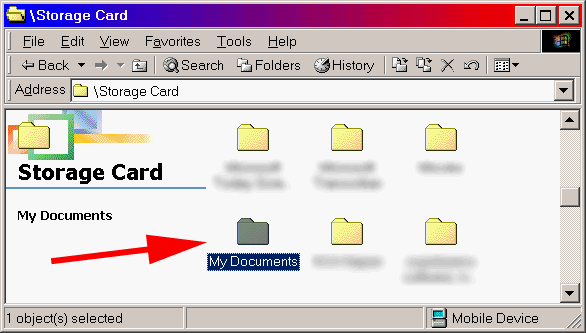 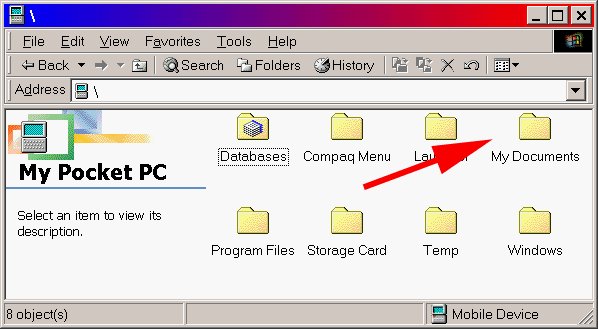 Now that you have opened your "My Documents" folder, you need to look for (or create) your HandyMed Data folder, as shown by the red arrow below, and then open it.  Now that you have opened your "HandyMed Data" folder, you will see something similar to the screenshot below, with all of your HandyCards data files. It is into this folder that you should place your study files. You should also place your images and sounds used in your various data files into this folder. 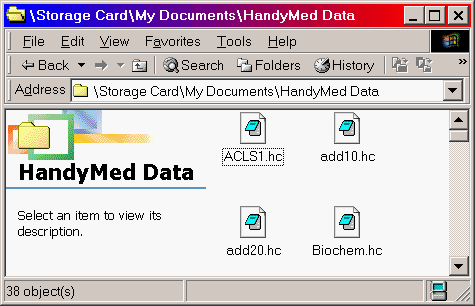 If you have any questions not addressed by these instructions, please contact support for more information.
|